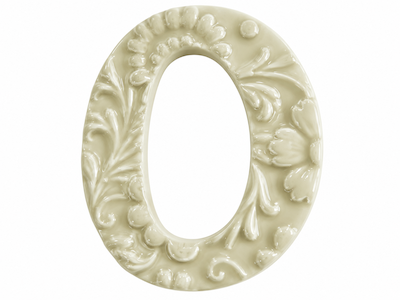
White Floral Porcelain Number Tile - No. 0
$6.00
VIEW ALL


Mon, Feb 09, 2015
I have never been known to do anything in halves, take on a project and watch it grow. This is what's happened to our mushroom project. It started as a small project to demonstrate how to make a mosaic mushrooms, to making some for the front of our warehouse, to making a massive piece for our towns up coming Lake Light Sculptures Event on the Easter Long Weekend. So now I've got 4 of my friends and myself making, mosaicing and decorating a mass of mushrooms, by the time we're finished we will have over 50 gorgeous mushrooms (hopefully!).
As our mass of mushrooms grows our knowledge of what to do and not to do also does. As we progress we will be updating this blog post, sharing our first hand experiences.
I encourage you to make a mushroom or two for yourself as we are having lots of fun!

Mosaic Mushrooms by Mary Foley
We are using the following techniques to create our mushrooms.
Technique - Casting Method
Materials:
1) Put a least 30 cm's of sand in a large plastic container (we used an outdoor garbage bin). Make sure the sand is damp so that when you create a shape it holds its form.
2) Create an impression in the sand to form the top of the mushroom. We used spoons to dig the shape out.

3) Pour your cement mixture into the mushroom form. Press a galvanised rod into the cement after about 30 minutes, this will be the support for the mushroom stem.
Note: We used a metal bolt in our first mushroom (pictured below), but found this inadequate. Rather we have now switched to using metal rods that run all the way through the mushroom and have a piece protruding to stick the mushroom into the ground. The rods we are using are 10mm thick and threaded to give the cement more to 'grip' to. The amount that you will need protruding will depend upon the size and weight of your mushroom but we have about 10 cm's on average.
We found that the sand dried the cement out very quickly which isn't ideal because cement needs to stay moist to cure properly. If cement dries out too quickly its integrity will be compromised, so make sure you keep the cement and sand moist to prevent this from happening.

4) When the cement mixture dries enough to support the PVC pipe, mix a second batch of cement, which will be poured into the PVC pipe. The consistency of the cement is very important at this stage, make sure that it is pourable. On our first attempt we spooned the cement into the PVC pipe, but on removing the pipe found it to have lots of holes as pictured below. The shape of this mushroom top is fantastic so not wanting to lose it, I smashed off the cement stump before it cured and re-poured it.

Initially we coated the inside of the pipe with vaseline to help remove the cement stem, but have now abandoned this step as the vaseline is messy and hard to remove from the cement. Now we have purchased some thinner PVC pipe (which is used for irrigation purposes), the thinner pipe has more flexibility making it much easier to remove the cement stem when set.
Before you pour cut a slit in the pipe and seal the slit with duct tape. The duct tape will prevent the cement from seeping through and is easily removed.

5) When set, remove the cement form from the cement and allow it to cure for a week. This step is very important and if not completed will affect the integrity of our finished piece. Cement needs time to strengthen, this is known as the curing process. To cure our mushroom we are keeping them moist by wrapping them in plastic and spraying them with water a few times a day, for 7 days. This is known as moist curing.
Technique - Molding Method
The difference between the casting and molding technique is simply what you use to create the cement form. In the casting technique we used sand to create a shape and then poured the cement into it to set. Whereas in the molding technique we have used and continue to experiment with all kinds of objects to obtain different mushroom shapes.
So far we have used glass bowls, hanging garden baskets and know we are trying silicon cooking molds. By far the best shapes have come from the hanging garden baskets, which have been lined with plastic. We found the glass bowls hard to remove; in fact we had to smash one off. I found a technique which covered the glass bowl in cling wrap which I am going to try next. I haven't used the silicon molds yet.


Other Techniques
Cement can be coloured using cement oxide, which you can purchase from a hardware store. When using cement oxide don't use more than 10% oxide to cement, as it may affect the integrity of the cement. Cement oxide comes in a good variety of colours including yellow, brown, red, blue, green etc. The oxide is added to the cement when it is in powder form.
We laid some tumbled glass pieces into the top of one mushroom prior to pouring the cement, hoping to them polish the glass and cement once cured. Unfortunately I didn't realise that you require a special cement polisher to do this a have since abandoned this idea.
Pictured below are some of our mushrooms in various stages of completion. Sorry but we can't show any more until the big reveal in Easter!