1300 320 392
Yellow Floral Porcelain Bird
$4.99
VIEW ALL


Mon, Jul 21, 2014
There are two basic methods of mosaic work, the direct and indirect (or reverse) method. By far the most common and easiest method is the direct method. In choosing which method is appropriate for your project you need to assess the projects requirements and the advantages and disadvantages of both methods.
Direct Method
The Direct Method involves gluing the mosaic pieces directly onto the base.
Advantages
Indirect Method
With the Indirect Method the mosaic is created backwards like a mirror image. The method involves temporarily fixing the mosaic pieces to a removable backing which holds the design together. When completed the whole mosaic is transferred onto the base.
Advantages
Disadvantages
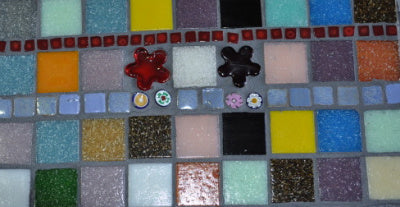
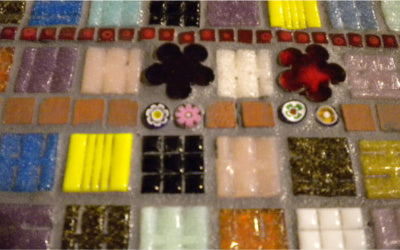
Demonstrating the Indirect Method of Mosaics
In additional to demonstrating the indirect method I am also introducing the techniques of 'pre-grouting' and 'buttering the back of the mosaic' in this newsletter.
I have deliberately chosen tesserae of varying thickness to demonstrate how you can get a smooth surface by using this technique.

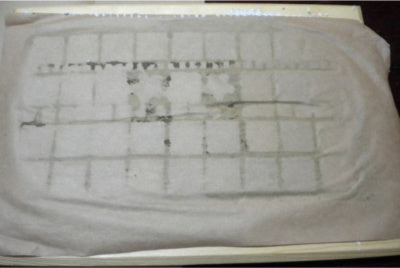
Step 1: Preparing the brown paper
The brown paper is Kraft or butchers paper. Cut the piece of paper just slightly smaller than the surface you are going to adhere the mosaic too.
Step 2: Transferring your design to the paper
Transfer the design onto your paper in reverse. To do this you could use a thick black texta, draw the design on one side (right way up) turn it over and trace the texta line.
Step 3: Adhering the tiles to the paper
In this technique the tiles are adhered to the paper faced down. To adhere the tiles you need to use a water soluble adhesive like watered down PVA (1 part PVA glue to 3 parts water) or a Glue Stick. I prefer to use a glue stick (Bostik) as the paper doesn't get wet and buckle, which makes it difficult to lay small tesserae consistently. Play around with different adhesives and see which works best for you.
If using PVA and small tesserae pre-stretch the paper by immersing it in water and sticking it to a board stop the paper buckling.
When using a Glue Stick you can either apply it directly to the paper or to the face of the tile.
When adhering your tiles you need to remember that the spaces you are leaving between the tiles will form your grout lines, so position them consistently.
Once the adhesive has dried, lift it up (ensuring it doesn't sag) and check that the tiles are adhered to the paper. If any tiles fall off re-adhere them and wait for the adhesive to dry.

Step 4: Pre-grout the Mosaic
Pre-grouting involve grouting the mosaic while it is still attached to its temporary base (in this case the brown paper).
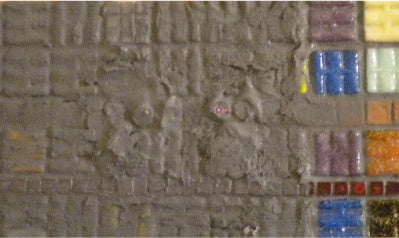
Why pre-grout? Pre-grouting creates a barrier to ensure that the adhesive on the mosaic base doesn't seep through to the top of the tiles. Apply the grout (gently so as not to dislodge any tiles) so it fills all the joints, then remove all excess grout from the bottom of the tiles with a slightly damp sponge. Clean your sponge after each wipe so that you are not re-applying the grout you have removed. Make sure that you have removed all the grout from the backs of the tiles as any remaining grout will interfere with the bonding of the adhesive to the base. Pre-grouting is optional. I have used this technique as one of my tiles is only 3 mm's thick which doesn't leave much room for error with the cement based adhesive.
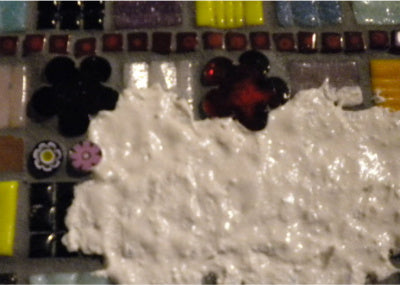
Step 5: Buttering the back of the mosaic
Buttering the back of the mosaic involves applying a coat of cement based adhesive to the back of the mosaic to compensate your differences in the thickness of the tesserae. The cement based adhesive is applied with a spatula or small tool up the level of the thickest tesserae. It is important to make sure the adhesive is level.
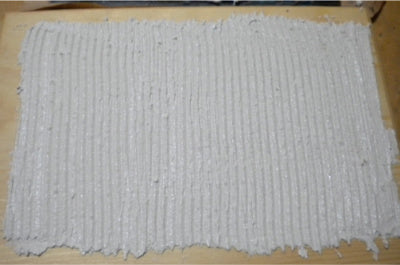
Step 6: Applying the cement based adhesive to the mosaic base
Apply the adhesive to the base not wasting any time; use a notched spreader to create grooves in the adhesive. The layer of adhesive must be even. This can be achieved by the teeth of the spreader touching the board as it is dragged through the adhesive.
Step 7: Lay the mosaic onto the base
Carefully place the mosaic onto the base paper side up, ensuring that t is correctly aligned (you may need an extra pair of hands to help you). Place a board onto of the mosaic and press down carefully to ensure all the tiles are in contact with the adhesive and no air is trapped. The aim is to create a flat, even surface.
Step 8: Remove the brown paper
Wet the brown paper down with a damp sponge to dissolve the glue on the back of the tiles. Start peeling from one of the corners, if the paper doesn't come away easily continue to wet it until it does. If any of the tiles come away replace them.

Step 9: Re-grout the mosaic
Clean off mosaic and allow it to dry. When it has dried sufficently, re-grout the front of the mosaic.
Handy tips: