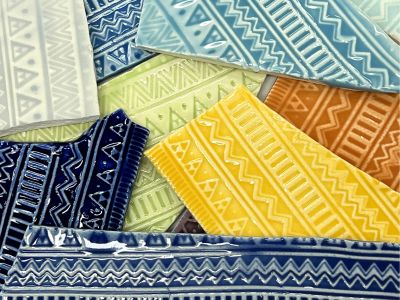
img img img img

Sun, Jul 14, 2013

Some Handy Mosaic Tips & Techniques That You Can't Afford To Miss!

Here is a collection of Mosaic Tips & Techniques that I've complied from many years of reading and working in mosaics. There is sure a little gem here that will not only save you time and money, but also help you produce a better mosaic.

GROUTING TIPS

  • Changing grout colour - If you've used the wrong grout colour you can change it by painting the grout lines. Apply acrylic paint with a fine brush after the grout has dried and wipe away any excess paint from the tesserae as you go.
  • Discarding of unused grout - Never wash any unused grout down the sink as it can harden within your pipes and cause blockages. Better to use a disposable container that can be thrown away once you've finished or discard the unused grout in a discrete area of your garden. 
  • Wiping away the grout - When cleaning off excess grout make your strokes diagonal to the direction of the tiles. This will help minimise the grout from being removed from the spaces.
    • Removal of Grout Haze - To remove unwanted grout from the surface of your mosaic wait until the grout has completely cured (about two days) and apply a wash of household white vinegar to the surface. This should give your mosaic a nice sheen and remove any residual grout from the surface.
    • Colouring Grout  - White grout can be coloured using acrylic paint which greatly increases your colour options. When using paint as a colourant, the amount of water needed will be reduced.  Always mix more grout than you will need as it will be practically impossible to mix the same colour again.
    • Removing dried on Grout - If you have a project where you've left the grout on for too long and it has set hard, try using a wire pan scourer and was soapy water to remove the grout.
    • Containers for Mixing Grout or Adhesive - Clear plastic party cups come in handy for mixing grout and adhesive. Not only are they cheap and disposable but because they are see through you can make sure all the powder is mixed completely. Before you grout your project, put a small amount of dry grout in a plastic bag and label it with the projects name. This will come in handy if you need to do touch ups or repairs later on.
    • Repairing inconsistencies in the grout surface Inconsistencies, such as air pockets, can appear in the surface of the grout. To remove these you can apply a second layer of grout once the first layer has dried completely. Apply the second layer of grout by rubbing a small amount of grout into the irregularity with your hand (gloves recommended) and wipe off the excess immediately. Place some dry grout in a plastic bag when you're initially mixing the batch to ensure you have an exact colour match. Deciding whether to grout or not to grout Not all mosaic projects need to be grouted.
    • Factors to consider when deciding to grout or not to grout are:
      • The environment in which the mosaic will be placed. If it is outside or will be exposed to water than it should be grouted.
      • What is the purpose of the mosaic? If it has a functional purpose like a lazy suzanne for example, than it should be grouted.

    ADHESIVE TIPS
     
    • Cleaning up your adhesive - When applying adhesive make sure you clean off any excess when you've finished for the day. If you don't, next time you start to work you'll find that you're laying your tiles on an uneven base.
    • Adhesive - Did you know that you can colour your adhesive? This is particularly useful if you're not grouting the mosaic and are worried about the adhesive showing through. You can either add a powder pigment to the dry adhesive or paint to the wet adhesive.
    • Adhesive drying time While it is tempting to speed up the drying time of the adhesive, by placing it in front of a heater for example, this should be avoided. To allow the adhesive to achieve a really firm bond it should be allowed to dry in its own time.

    TILES
     
    • Cutting Tiles - When cutting tiles keep the nippers down at your knees to avoid the shards breaking near your face. Using a shallow box to catch the shards will keep your work area cleaner and assist with the clean up.
    • Cutting Tiles - When cutting tiles to help you visualise the shape draw a pencil line on the tile first. 
    • Laying of Tiles - When working on large designs, e.g murals or splashbacks, work from the focal point out. This will help centre your design and avoid awkwardly spaced tiles. 
    • Tile Quantities - When working out the quantity of tiles you require add an extra 10 - 20% to cover any wastage due to cutting.
    • Lose Tiles - If a tile becomes lose while grouting, remove any excess grout with a cotton wool tip then re-stick the tile with adhesive and carefully grout.

    GENERAL TIPS
     
    • Keep your work surface clean - To ensure your tiles or tesserae are laid flat, keep a large brush (about 5 to 6 cm's in width) handy to brush away any glass shards. Place a small bin or dustpan next to you to make the clean up easy.
    • Care of your Wheeled Nippers - To get a longer life from the wheels of your nippers rotate them periodically. Before you first start using your nippers get a permanent marker a draw a line where you first start using them. You will eventually return to the line as you rotate them which will signal its time for new wheels. Doing this will give you a sharp cutting edge and increase the blades life.
    • Preparing your Mosaic Surface - If you are mosaicing a heavily patterned or coloured surface consider painting the surface white first. This will not only seal the surface but give you a white work surface which will allow your design to be seen more clearly.
    • Gaining Perspective - It is easy to lose track of the big picture when working on a mosaic, so to help you gain some perspective try taking a step back and view your mosaic with squinted eyes. This will remove the detail and enable you to focus on the overall design.
    • Protecting the edges of your base - You can protect the edges of your base from grout by using masking tape. Simply tape up the edges prior to grouting and remove it after you have grouted and cleaned the mosaic.
    • Working on an easel - If you are working on a small project, like a mirror or picture frame, try working with the base propped up on an easel (on a 45 degree angle). Not only with this save your back and neck but it will also help you view your work it from a distance.

    NEW ARRIVALS

    VIEW ALL
    img

    Colour Mix Gloss Glass Tiles 1cm

    $5.50
    VIEW ALL
    img

    Iridised Mix Crystal Glass Mosaic Tiles 1cm

    $5.25
    VIEW ALL
    img

    Transparent Green & Gold Glass Leaf Beads

    $4.99
    VIEW ALL
    img

    Light Green Glass Leaf Beads

    $4.99
    VIEW ALL