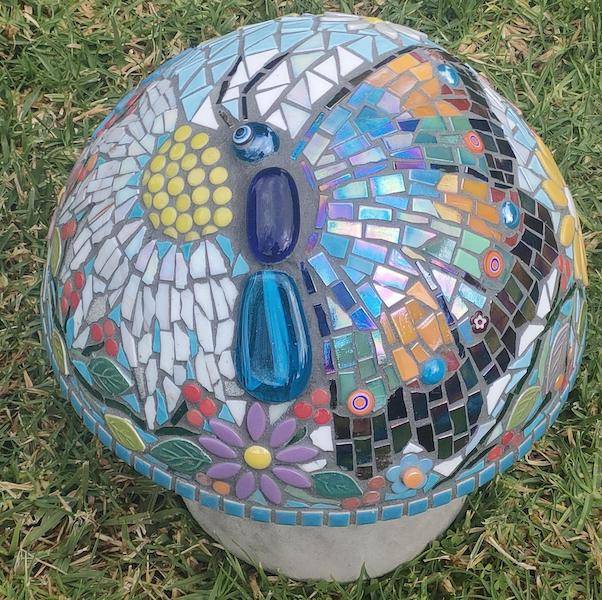
Repurposing a Bowling Ball into a Gazing Ball
By Dee Brown
Splinters & Shards
Delta, Colorado, USA
In this class, the basic bowling balls were roughed up with a 4” angle grinder. I thought this might help the adhesive and tiles adhere better. In the next class, I didn’t use a grinder to rough them up. There were no issues with the tiles not sticking to the ball, so it’s not a necessary step – just personal preference.
The adhesive used was GE clear silicone. Any colour will work, as there is no transparency with these, obviously. GE is what I prefer to work with. If the Gazing Ball is going to be used outdoors, I suggest silicone be used – something that isn’t water-soluble. If it will be used indoors (sunroom or indoor greenhouse), other adhesives can be used. Your preference.
When discussing adhesives, remember you're working on a rounded surface, so use an adhesive that tiles will stick to easily and won’t slide as soon as you apply them. I worked in sections. Mentally picture your design and divide it into sections.
2” insulation tubes were cut and used to create a circle to sit the bowling ball in. A string was run through the tube and tied together to make a base for the ball. Plastic 6” turntables were purchased from Amazon.
Now, with a sponge circle on a turntable, place the bowling ball in the circle and rotate it, allowing you to glue tiles around it without moving the ball too much. The foam circle should be tight enough so the ball doesn’t touch the table. If it touches, it’s harder to rotate and can damage your finished tiles.
Use any colour marker that will show on the bowling ball. Mark a line completely around the ball about 1/2” or so above the sponge tube, then flip the ball and centre it. Now you’re looking at the base, which you'll complete first.
Next, consider the stand your finished Gazing Ball will be placed in/on. The stand’s width, height, open bottom, flat, round, etc., will determine how you finish the bottom of your ball. If your design has a lot of textured or raised tiles, ensure the bottom of the stand allows that design to show through without damaging or popping off the tiles. My preference is a smooth bottom with tiny tiles that won’t pop off, and no specific design. Again, your choice.
Complete the bottom first. Let it set for a few hours until the tiles stay in place. This counts as Section 1 of the design.
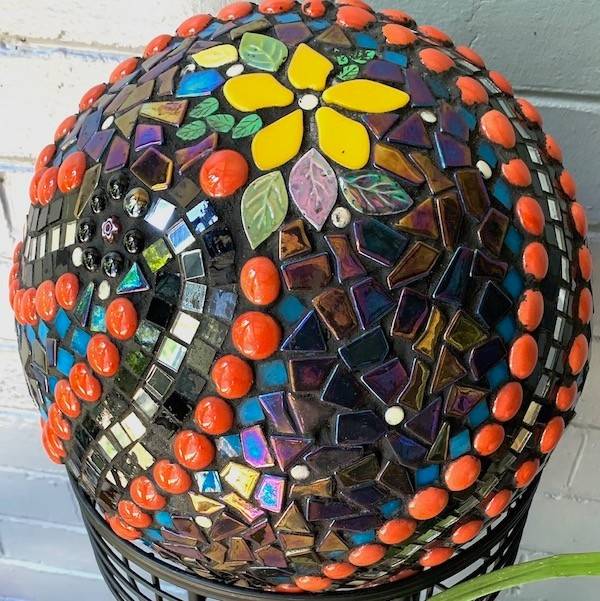
Once the bottom is dry, flip the ball over and adjust it so all sides are reasonably even. Section 2 will be the entire top, which you will divide into subsections visually. Quarters should be sufficient. Mark the centre of the top. This is for eye appeal, and your design may require it. It serves as your focal point and helps keep the ball visually balanced. Not absolutely necessary, but it’s nice.
Always try to work on the highest rounded area first. Let an area dry, then pick up your ball and move it around—do not slide it, as this might dislodge tiles you've just applied. If you follow this approach, you'll find the tiles don’t slide as much. Avoid leaving sharp points sticking up, as they can be difficult to grout and very painful! If a tile rocks back and forth a lot, trim it down. Use your judgement here. Let everything dry overnight at least.
A tip from a friend: apply the adhesive to the ball in small areas, then place your tiles onto the adhesive. This method keeps silicone off your hands for the most part. Always remember that everything you touch, you’ll need to clean! The alternative method is to put the adhesive on the tiles before placing them on the ball, but be extra careful to keep the adhesive off your hands to avoid extra cleaning.
Depending on your design and the height of your tiles, the grouting can be done the same way. If your Gazing Ball will be placed outside in the elements, I recommend using a tile sealant. Just follow the instructions on the bottle, which is available at any hardware store in the tile section.
Finally, avoid using mirrors on your ball outdoors. Someone did this, and the sun reflecting off the ball started a fire nearby. Birds may also peck at the ball, mistaking their reflection for another bird.
Thank you, Dee! We love seeing your projects and truly appreciate the tips and techniques you've shared.
 1300 320 392


