img img img img

Thu, Dec 08, 2022

Learn How To Make A Mosaic House Number

Wow, how fabulous is this House Number by Deb Sturgess? When we saw a photo of this beautiful Mosaic House Number, we were so impressed that we asked Deb to share her project instructions with us, and we're so excited that she has. The 3-Dimensional numbers are unique and make this project stand out.

Deb guides you through what materials and supplies you need and provides step-by-step instructions to make one for yourself.

Thank you, Deb, for your generosity. Your project will inspire many people.


PROJECT INSTRUCTIONS

This project is worked in three parts:

  • The backing board
  • The raised numbers
  • The overlaid dragonflies

IMPORTANT: Because this is an outdoor piece, be sure to prime and seal the board and numbers. Also, so your number cannot be prised from your fence or house front, it is suggested that you make allowances to screw both the backboard and the numbers into place.


MATERIALS & SUPPLIES

Base and Numbers

* A backboard suitable for outdoor use, cut to the preferred dimensions. (This one is fibre cement, approx.. 42cm W x 30cm H)

* House numbers in a material suitable for outdoors. Not MDF. (These are 150mm H 16mm D ‘Chunky House Numbers’ and were purchased online from The Letterbox Shop)

Tiles

Exterior tiles. In the project shown, I used the following:

Primer / Adhesive / Sealer

* Primer – Dulux 1 Step Prep (primer, sealer and undercoat) from the hardware

* Cement based adhesive (suitable for outdoors)

* PVC adhesive

* DTA Grout Sealer

* Silicone (small amount)

Other items

* 4 screws for the backboard and two screws for each number; A drill and screwdriver.

* 2-wheel tile nippers and tile scorer or glass cutter

* Tweezers and positioning tools

* Containers and utensils for mixing glue

* Small ziplock bags for gluing (to be used like a piping bag icing)

* Container for mixing grout, bucket, gloves and cloths.


STEPS

* Prime the backboard and house numbers on all sides. Allow to dry.

Backboard

* On the backboard, drill a hole at each corner approx. 1.5 cm in from the edge.

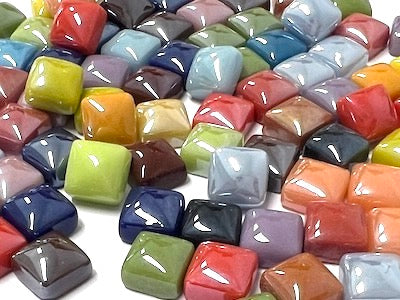
* Draw or trace the pattern onto the backboard and choose your palette of tiles.

* Cut and place your tile pieces as desired

* At different intervals, mix the cement-based adhesive (in small amounts), place it into the zip lock bag and seal. Cut a small hole in one corner and pipe the glue onto each piece. This allows you to work slower when gluing because the glue will stay viable for hours.

* Tile the whole board, working around the drilled holes so that the board can be screwed in place later.

Numbers

* Glue 2mm tiles to the 16mm edge of the numbers.

* Mosaic the rest of the house numbers, leaving the screw holes uncovered. A small glass gem or ceramic dot will fit perfectly over these once the letters are screwed to the backboard.


Dragonflies

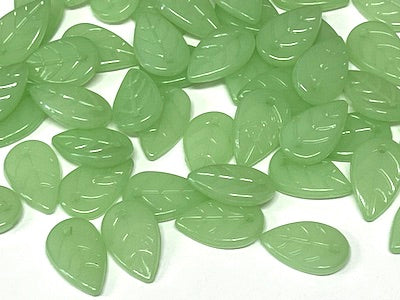
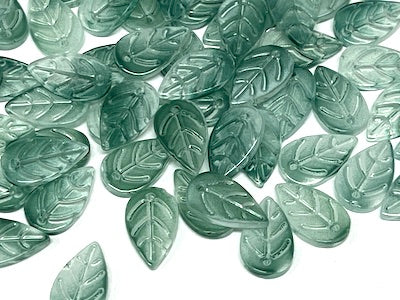
* Choose the glass gems for the dragonflies and cut the stained glass or tiles to the shape of the wings. Set aside.


Grouting and assembling the board

* Grout both the board and numbers separately.

* When the grout is dry, clean your mosaic and seal everything. Be sure to wipe the sealer off the tiles before it dries.

* Place your numbers in the desired spot and mark with a chinagraph pen or similar.

* Put some PVC glue on the back of the numbers and position it on the backboard. Allow to dry. This will ensure they stay in place whilst they are being screwed to the backboard.

* When dry, screw each number onto the board and glue a glass gem or ceramic dot over each screw.

*Now glue the dragonflies on top of the backboard and grout around them if necessary. (If your mosaic fits together tightly and the glue has covered the entire bottom of the mosaic piece it doesn’t make a lot of difference if they are grouted or not).


When mounting the board to the fence or house, once it has been screwed on use some silicone to glue glass gems over the screws. Using silicon makes it easier to pry the gems off if you are wanting to remove the board but harder for someone to remove it quickly.


HAPPY MOSAICING !!!


CLICK TO DOWNLOAD THE INSTRUCTIONS


SUPPLIES TO MAKE MOSAIC HOUSE NUMBERS

HOW TO MAKE A MOSAIC HOUSE NUMBER

HOW TO MAKE A MOSAIC HOUSE NUMBER

HOW TO MAKE A MOSAIC HOUSE NUMBER

NEW ARRIVALS

VIEW ALL
img

Colour Mix Gloss Glass Tiles 1cm

$5.50
VIEW ALL
img

Light Green Glass Leaf Beads

$4.99
VIEW ALL
img

Green Glass Leaf Beads

$4.99
VIEW ALL
img

Green Graduated Glass Leaf Beads

$4.99
VIEW ALL