img img img img

Mon, Jun 29, 2015

Learn How to Make a Mosaic Mural

Mosaic murals are a popular project, the perfect way to add your own touch to your home. This guide outlines the process of creating a mural (picture) step by step.


PROJECT TYPE Mosaic Mural (Direct Method)
MATERIALS
  • Mosaic tiles
  • Mosaic base – Compressed Fibre Cement, Marmox, wedi board or a more expensive option Ayrelite (an aluminium honeycomb with a fibreglass skin). Wood based products such as Marine or external ply are not recommended if they are going to be used for outdoor mosaics.
  • Adhesive
    • Non-Waterproof – Good quality PVA glue (Weldbond etc)
    • Waterproof - Cement based adhesive. Dunlop brand manufacture an adhesive called ‘Tile All’ which is available from Bunnings and suitable for this project. It is a two-part adhesive that needs to be mixed immediately before use.
    • For guidance on selecting an adhesive view our reference guide.
  • Grout – Grout can be purchased from a hardware or tiling store. You can purchase pre-mixed grouts or colour your own with grout colorants, powered grout is superior to the pre-mixed grout that come in a tube. You can purchase grout additives which improve the flexibility of the grout.  Click here for the 'Beginners Guide to Grouting' and 'The Ultimate Guide to Choosing a Grout Colour'.
TOOLS
  • Mixing adhesive – Container & implement for mixing
  • Tool for cutting mosaic tiles - Wheeled nippers for glass mosaic tiles
  • Applying adhesive – Paint brush or palette knife
  • Grouting – Container for mixing grout, implement for mixing grout, container for water, sponge or cloth, gloves
INSTRUCTIONS

(Note: Some of these steps may not be necessary in your project)

  1. Seal your base. For indoor mosaic diluted PVA glue with water is adequate, ratio of 1 part glue to 4 parts water, 2-3 coats to be applied with 30 minutes between coats. For outdoor mosaics a good quality sealer or membrane is recommended. If using a sealer 4-5 coats with 30 minutes between coats for drying. Grout additives also double as sealers, which can save you money.
  2. Plan your design, just an outline is fine for making a mosaic. Transfer your design onto your mosaic base. Click here if you need help doing this.
  3. Cut your tiles
  4. Apply your adhesive to the base, small sections at a time so that it doesn't dry out. A palette knife is a useful tool for doing this. Create a bed of adhesive if using a cement based adhesive. 
  5. Lay the mosaic tiles into the adhesive
  6. Once complete allow the adhesive to dry for 24 hours before grouting.
  7. Remove excess adhesive from the top of the tiles, if any adhesive is flush with the tile it will show through the grout, which is unsightly.
  8. Grout the mosaic

If you intent to hang your mosaic mural, pre-drill your holes into the base before tiling. You can then add these tiles once your mosaic is hung, keep small amount of grout spare to grout around the edges.


NEW ARRIVALS

VIEW ALL
img

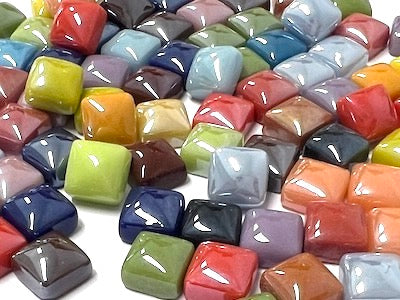
Colour Mix Gloss Glass Tiles 1cm

$5.50
VIEW ALL
img

Iridised Mix Crystal Glass Mosaic Tiles 1cm

$5.25
VIEW ALL
img

Transparent Green & Gold Glass Leaf Beads

$4.99
VIEW ALL
img

Light Green Glass Leaf Beads

$4.99
VIEW ALL