img img img img

Sun, Oct 13, 2013

The Mesh Method of Mosaics Demonstrated

Mesh Method of Mosaics


I'm often asked by customers what's the easiest way to create a mosaic in a hard to reach place and how do I use fibreglass mesh to create a mosaic? So here it is, the mosaic mesh method demonstrated.


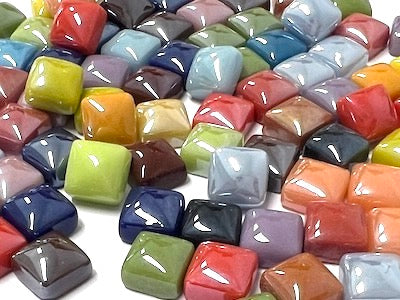
In this method tiles or tesserae are adhered directly onto fibreglass mesh which is then set into a bed of cement based adhesive. You are working using the direct method.


Advantages of the fibreglass mesh method:


  • The mosaic can be prepared in your work environment and then cut down and transported to the site for installation.
  • It's great for mosaics which are vertical or in difficult to access areas (like splashbacks, floors and fireplaces).
  • You don't need to draw your design directly onto the substrate. Rather you draw your design onto paper and an outline on the mesh.
  • Multiple individuals can work on the same mosaic easily.
  • You can make your mosaic and then cut your substrate to fit.


Step 1:Cut the mesh so that you have a straight line which can work as a grid for your design.


Mosaic Mesh


Step 2


Draw your design onto paper to the actual finished size of the mosaic.


Step 3


You need to work on a large flat area. If you work needs to be moved place a piece of cardboard or plywood underneath it to make it sturdy. In between your design and the mesh place a layer of plastic wrap or wax paper (it needs to be a non stick surface otherwise it will adhere to the mesh). Use tape to secure the design, plastic wrap and mesh to ensure it doesn't move. Any movement will result in your design shifting. Use a permanent marker to draw an outline of your design onto the mesh. 


Mosaic Mesh Method Demonstrated


Step 4


To adhere the tiles to the mesh you can use Weldbond, PVA or Thinset (cement based adhesive). Weldbond and PVA glues are suitable for indoor environments only because the glue is water soluble. Thinset is also used when using transparent tiles / tesserae to hide the mesh. The adhesive can either be applied to be back of the tiles or directly onto the mesh. The adhesive needs to be thick enough to hold the tiles securely. Don't apply too much adhesive at once to the mesh as it will create a lumpy surface if it dries before the tiles are laid. Once you've finish allow the adhesive to dry completely (24 hours). Tip: Don't cut your tiles over the mesh. Tile shards can get caught in the mesh resulting in poor adhesion between the mesh and your tiles.


Applying tiles to mosaic mesh


Step 5


Remove the mesh from the plastic wrap. The glue on the back of the mesh will still be wet but your tiles should be adhered. Allow the glue to dry completely then trim off any excess mesh. If your mosaic is large you may want to cut it into workable sections. When doing this make sure that you code your pieces so that you know how they fit back together.  


Use Cling wrap with mosaic mesh


Step 6


Mix your cement based adhesive and apply it evenly to your substrate, it should be about half the thickness of your tiles. Place your mosaic onto the adhesive and carefully position the corners. When you are happy with the alignment use a flat piece of board to press it down. Use a tool or toothpick to remove any adhesive that come through the mesh and is at the height of the tiles.


Mosaic Mesh method demonstrate


Allow the adhesive to cure completely and then grout the mosaic.

NEW ARRIVALS

VIEW ALL
img

Colour Mix Gloss Glass Tiles 1cm

$5.50
VIEW ALL
img

Iridised Mix Crystal Glass Mosaic Tiles 1cm

$5.25
VIEW ALL
img

Transparent Green & Gold Glass Leaf Beads

$4.99
VIEW ALL
img

Light Green Glass Leaf Beads

$4.99
VIEW ALL